Saturday, June 25, 2011

Ham and Mushroom Muffins


I decided to take a break from sweet cupcakes and made these yummy ham and mushroom muffins for breakfast this morning. Unfortunately, they were a little bland and only mediocre. But the recipe can definitely be altered for a flavorful masterpiece! The recipe is from my Hummingbird Bakery cookbook.

The recipe calls for you to..
Preheat oven to 325 degrees

Melt 3 1/2 tablespoons butter into a saucepan over medium heat.
Fry..
1/2 small onion, finely chopped and
1 cup button mushrooms (couldn't find them so I used regular mushrooms, sliced)
Sea salt
Black pepper

Put in a large bowl..
2 3/4 all purpose flour
2 1/2 teaspoons baking powder
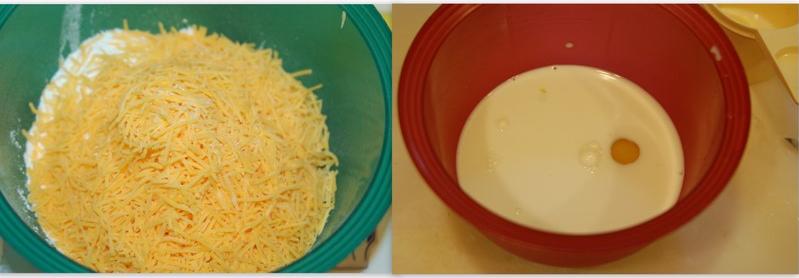
2 cups grated cheddar cheese

Mix in a separate bowl..
1 cup whole milk
1 egg (I used two for more moisture in the muffins)

While mixing, slowly pour in the flour mixture. Then use a wooden spoon to stir in the mushrooms, onions, and 2 1/2 oz. smoked ham finely chopped (I used regular deli ham but I recommend using the smoked ham to give the muffins more flavor).

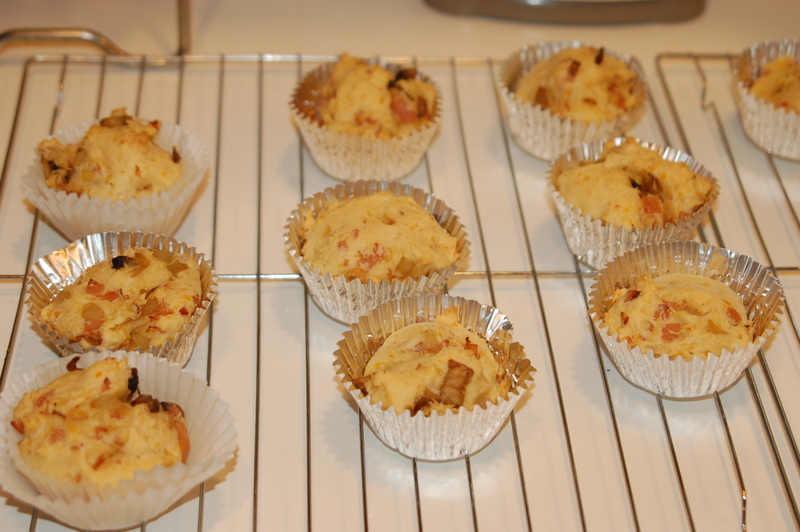
Spoon into cases and bake for 30-35 minutes.


Like every Hummingbird recipe, I couldn't believe the thickness of the batter. Those foreigners are crazy, but I guess the English like their dense biscuits. From experience with the Hummingbird recipes, I decided to add an extra egg to add more moisture to the batter and make the muffin rise more than their usual recipes allow. The extra egg worked out well, but next time I would try adding more milk instead to see what a difference it made.

Hummingbird Bakery must be plotting to destroy the hand mixers of all competing bakers' because although they recommended it for the batter, smoke was literally coming out of mine before I added an extra egg. Even then, I  spooned the batter into a standing mixer to give the poor guy a break.

Finally, I think chopped basil or sauteed shallots would add a lot to these muffins and I'll definitely try to throw one or the other into the batter next time I make them. Until then, experiment on your own!

So to conclude my tips for this recipe..
DO NOT use a hand held mixer - a standing mixer will be much less hazardous to your kitchen appliances
DO use smoked ham, not just simple honey ham deli meat
DO add an extra egg or an extra 1/3 of a cup of milk
Test out throwing in some chopped basil or sauteed shallots

Have a happy breakfast!
Sunday, June 19, 2011

Pretty in Purple


Happy birthday Aunt Sharee and cousin Zachary! This post is very late, but these cupcakes were decorated for their birthdays about a month ago.

The flowers are made from Wilton's royal icing recipe. The royal icing dries like cement so it's perfect for decorations. It is edible but it looks better than it tastes. I don't usually eat the flowers I make, but other people do! Maybe it's just to please me haha.

I made the flowers the day before because they have to dry completely before decorating or else they'll break. Also because I would be running around like a crazy person trying to get everything done the day of. The flowers last days so you could really make them a week in advance if you wanted to. They were made using piping bags and different piping tips.


I iced the daisies first, using white and yellow icing. I used a Wilton flower template for guidance and placed them on a curved plastic board for a realistic shape. All of the flowers were piped onto wax paper to assure easy removal when time to decorate.

The secret to a flat yellow center of a daisy is to gently push the yellow icing down with your finger after 5 minutes of drying. Its then dry enough to not stick to your finger and gets rid of the spiked yellow center.

I used purple and yellow icing to pipe the violets. Again, I used the Wilton template for guidance and the curved board for the realistic effect. I swear these violets gave me carpal tunnel. But it was worth it!


I used the Hummingbird Bakery cream cheese frosting recipe.
Using and electric mixer, beat together..
2 1/2 cups sifted confectioners' sugar
3 tablespoons unsalted butter at room temperature
Then add 4 oz. cold cream cheese.

Beat for at least 5 minutes, until the frosting is light and fluffy, but do not overbeat or else it will become crumbly.

I dyed the cream cheese frosting lavendar with Wilton's food coloring, which is the best of the best. I iced the cupcakes up with a large round piping tip. I wish the frosting had been a little more firm; it would have made the icing process much easier. Next time I'll pop it in the fridge for 10 minutes before icing.

I hope you like them!


Sunday, June 12, 2011

Black Bottom Cupcakes


These black bottom cupcakes definitely rank somewhere in my top 3 favorite cakes. The recipe is from The Hummingbird Bakery Cookbook, which was given to me by my lovely sister Sam.


Preheat the oven to 325 degrees.

Start by mixing..
1 1/2 cups flour
1/2 cup plus 1 tablespoon sugar
1/3 cup unsweetened cocoa powder
1/2 teaspoon baking soda

Separately combine..
1/4 sunflower oil - who knows where these pro bakers are getting this "sunflower oil". I am confident that it
                             does not exist. I used safflower oil from Stop and Shop
1 1/2 teaspoons distilled white vinegar
1/2 teaspoon pure vanilla extract

Slowly pour the wet ingredients into the dry ingredients while the electric mixer is running. Increase the speed of the mixer as the mixture thickens.

When I made this batter I honestly thought I had done something wrong. The batter is as thick as dough and almost broke my hand held mixer! I reread the recipe about 10 times trying to find my mistake, but I couldn't figure out what was wrong, so the chocolate dough was there to stay. Turns out that I didn't do anything wrong, the batter is just crazy thick. When following the recipe I recommend adding a little more oil to make the cake a little more moist, and I also recommend using a standing mixer so your hand held mixer is not destroyed.

Make the cheesecake filling by beating together..
4 1/2 oz. cream cheese
1/3 cup sugar
1 egg
1/2 teaspoon pure vanilla extract
a pinch of salt

Do this in a standing mixer on medium-slow speed until the filling is smooth and fluffy.
Stir in 1/2 cup chocolate chips, but do not overmix! Otherwise the cream cheese will start to crumble.

Spoon the chocolate batter into the liners and spoon 1 tablespoon of filling on top. Bake for 20 minutes.


Cream cheese frosting can be used on top of these cupcakes if you have a sweet tooth, otherwise, the filling does the trick. Serving with chocolate milk adds a perfect finishing touch.
I cannot say with certitude that this is not part of my body.. okay enough Weiner jokes. To put ALL raging rumors to rest, and to please my sister, this is my father's wiskery mouth not mine.

Enjoy your day!

Wednesday, May 18, 2011

Raspberry Cottage Cheese Cupcakes


Hello all!

Sorry it's been so long since my last post! School has been absorbing all of my time and energy. But I'm finally done, and ready for summertime. And these raspberry cottage cheese cupcakes were the perfect, refreshing treat to kick off the vaca.

I personally love cottage cheese, but I know many people dont. But do not let this deter you from these cupcakes! The cottage cheese just ensures that the batter isn't too sweet - for those who have been keeping up with the blog, you know that an overly sweet cupcake is my biggest turnoff. The raspberry gives the cakes a perfect sweet and sour balance and keeps the cupcake moist and refreshing. This recipe is from The Cupake Calendar.

Start by stirring together..
2 1/3 cups flour
3/4 cup superfine sugar
1 tbsp. baking powder
a pinch of salt.

In a separate bowl, beat together..
2 lightly beaten eggs
4 tbsp. sunflower oil (which is seriously impossible to find. Use any light, tasteless oil - I used safflower oil)
1 1/4 cups low-fat milk
1/2 cup low-fat cottage cheese

Add the flour mixture and stir until nearly combined, then carefully fold in 2 cups of fresh raspberries. Spoon the mixture into the cupcake liners almost to the brim! These cupcakes do not rise.

Bake for 20-25 minutes at 350 degrees.


The cupcakes can be iced with cream cheese frosting if being served for dessert, or left plain if being served as a snack. Either way they were delicious! And left me with lots of leftover raspberries, YUM. You will definitely be seeing more from The Cupcake Calendar as the summer progresses.

Monday, March 28, 2011

Koi Fish


These koi fish are definitely one of my favorite creations. They're so cute and weird looking. And not to mention easy to make! And when their creepy stares become too much to handle, eating them is a great solution.

Start out with two circus peanuts. Cut a small chunk out of the top of one full peanut and set to the side. Then take the other peanut and cut in half "hot dog style". Then cut both halves on a diagonal. Next, arrange the peanut pieces on top of a blue frosted cupcake.


Next, use icing to secure orange peanut butter M&Ms onto the face of the koi fish, then secure the eyes by placing an orange Froot Loop mouth underneath the peanut butter M&Ms. Finally, place brown mini M&Ms onto the orange peanut butter M&Ms for the pupils. I liked letting the vanilla icing show underneath the brown mini M&Ms; I thought it made the fishes more odd looking.

How easy! I really enjoyed making these. The only downfall to these cupcakes is that I really don't like circus peanuts. But they were easy to pick off when it was time to eat!


Wednesday, March 23, 2011

Jungle Fever


Welcome to the jungle! These flamingo, alligator, and hippo cupcakes were a little bit of a handful but I really enjoyed making them. This recipe is another one from "What's New Cupcake", and required regular sized and mini cupcakes.

First I used neon blue food coloring to tint the vanilla icing. I iced the cupcakes only after I had the other animals made in order to ensure that the icing was wet. After icing, I rolled each cupcake in blue decorating sugar. This gives the cupcakes a little more pizazz, but if I were to do it again I would probably skip the sugar. While it looked better, it made the cupcakes a little too sweet for me.


(Ignore my wrinkly hands in the photo above, haha) I started out with the grass. I used airheads, only because I had them on hand from a different project - the recipe called for spearmint leaves. But I hate spearmint leaves so I opted for the airheads. I cut up two green airheads in different sized triangles and stuck them into the mini cupcakes. After about fifteen minutes, however, the airheads flopped over. But it wasnt hard to prop them back up.


Then I started on the hippos. I used a Nutter Butter for the hippo face. I iced on the orange Froot Loop ears and nostrils, and then I iced on the mini chocolate chip eyeballs. Let the white icing show behind the chocolate chips. I secured the hippo faces onto the regular sized cupcakes.

Next came the alligator. I used a serrated knife to cut the edges of a Nutter Butter to create a pointed shape for the head. I then used a knife to spread icing on top of the cut Nutter Butter and dipped the iced cookie into green decorating sugar. I cut the very bottom of two green Froot Loops and used them as the eyes of the alligator. I then used black tinted icing to pipe on the nostrils and pupils inside of the Froot Loops. Finally, I placed the heads on regular sized cupcakes, and used plain vanilla frosting to pipe on the alligators' teeth.


Finally I worked on the flamingos. I dipped pretzel sticks into pink melting wafers, placed the sticks onto wax paper, and stuck a large pink jellybean on the top of each stick. I put the pretzels and jellybeans in the fridge for 5 minutes. I then used a stencil to trace the wings of the flamingos onto wax paper with the pink melting wafers. I put those into the fridge for 5 minutes too. I iced the mini cupcakes with plain vanilla frosting and dipped them into pink decorating sugar. When I took the pretzel sticks out of the fridge, I inserted them into the mini cupcakes. Then, I cut banana Runts in half and used vanilla icing to secure them onto the pink jellybeans. I used black tinted frosting to pipe on the flamingos' eyes and smile. Finally, I inserted the wings and they were done!


The end result LOOKED great, but all the colored sugar made the cupcakes a little too sweet for my taste. The only time I would make these again would be for a kids party, I'm sure they would love all of the sugar!

Thursday, March 17, 2011

Happy St. Patrick's Day!


In the spirit of St. Patty's Day I made green velvet cupcakes with creamcheese filling. YUM. Red velvet is one of my FAVORITES, so I had to make sure these were good. I used a red velvet and cream cheese filling recipe from Lick The Bowl Good and added green food coloring to make it deliciously green! I also added a cream cheese clover for decoration (and as a good excuse to add more cream cheese).

The batter is made of:
  • 1 cup plus 2 tablespoons all purpose flour
  • 2 teaspoons unsweetened natural cocoa powder
  • 1/2 teaspoon baking soda
  • 1/4 plus 1/8 teaspoon salt
  • 1/2 cup vegetable oil
  • 2/3 cup granulated sugar
  • 1 teaspoon vinegar
  • 1 large egg
  • 1 tablespoon green food coloring
  • 3/4 teaspoons vanilla
  • 3 tablespoons sour cream (for those of you thinking EW, it worked really well in keeping the cupcakes flat and moist)
The filling is made of:
  • 4 ounces cream cheese, softened
  • 2 tablespoons granulated sugar
  • 1 ½ tablespoons lightly beaten egg
  • 1/4 teaspoon vanilla
This recipe is awesome because it only makes about 8 cupcakes. Who really needs 24 cupcakes sitting around the house? Its also great because it doesn't need frosting! The filling is sweet and savory enough to give you that extra punch. But make sure you refrigerate the leftovers or else the cream cheese will go bad.

First beat the cream cheese and sugar together until well mixed. Add the egg and vanilla and mix until smooth.

Combine the flour, cocoa powder, baking soda, and salt. Stir until well mixed. In a different bowl combine vegetable oil, sugar, vinegar, egg, food coloring, vanilla, and sour cream. Stir until well mixed. Add the liquids to the dry ingredients and stir until just mixed.

Now, fill 1/4 of the cupcake liner with the batter. Then fill another 1/4 with filling (or more depending on how much you like cream cheese!). Fill another 1/4 with batter. Finally pipe a clover design on top with the filling.

It's easiest to create these batter/filling layers when you pipe them into the liners from a baggie. This prevents the mess from a dripping spoon and also makes each cupcake more even. Just turn the baggie inside out and reach your hand into the it. Then create a cup with your hand inside the inside out baggie, and pour the batter into this cup from the outside. Then pull the top of the baggie off of your hand. This will catch all of the batter inside of the baggie and leave you with a clean hand and piping bag! I always use plastic baggies to pipe in my batter, and it never fails me!

(Inside out baggie with hand cupped inside)

I put the cupcakes in the oven for 20 minutes at 350 degrees, but I think it was a minute or two too long. Next time I'll put them in for only about 18 minutes. I'll also add more filling.

When you first take them out of the oven, the clovers will be a little bit broken because of the rising cupcakes, but as you let them cool, the cupcakes will fall and the clovers will recover. The cupcakes were SO good, and I will definitely make them again. I highly suggest trying out these fun creations. And since the color and design can change, you can use them for any occasion!